By Oleksandr Prykhodko, Ukraine
GWH, 1/48
TBD-1 Devastator: A Prewar Marvel of the US Navy Aviation
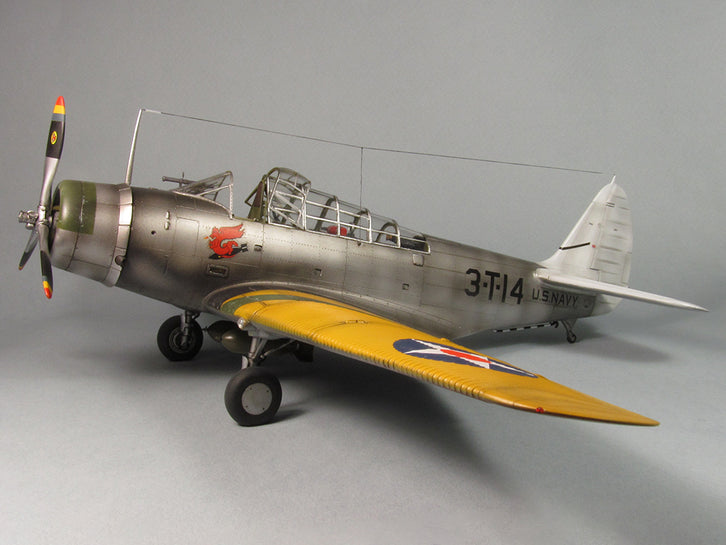
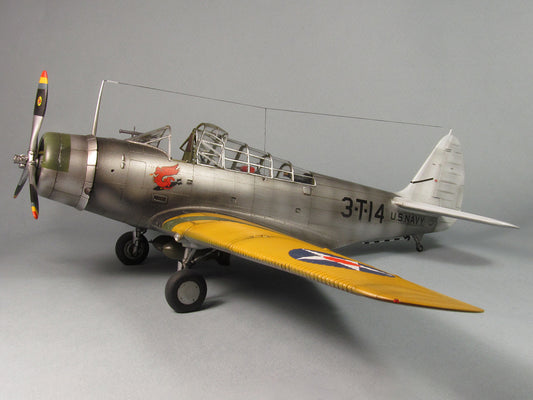
Hello, fellow enthusiasts and colleagues. Today, I'm excited to share my work on the Douglas TBD-1 Devastator, showcasing its vibrant prewar US Navy aviation colors. This model comes from the Chinese manufacturer, Great Wall Hobby, which decided to expand its interest in the early USN aviation.
About the Prototype
The Douglas TBD Devastator, an American torpedo bomber, was a cutting-edge addition to the United States Navy in its time. Ordered in 1934, it first took to the skies in 1935 and was officially introduced into service in 1937. At its inception, it represented the pinnacle of naval aviation technology, setting a standard not just for the US Navy but arguably for naval forces worldwide. However, the rapid advancement in aircraft technology soon rendered the TBD obsolete by the time of the Pearl Harbor attack.

Despite its early successes, notably at the Battle of Coral Sea, the Devastator's performance during the Battle of Midway was disastrously poor. Out of 41 Devastators, none managed to score a torpedo hit, and only six returned to their carriers. The aircraft's lack of speed and maneuverability made it an easy target for the faster and more agile Mitsubishi Zero fighters. This devastating loss underscored the Devastator's obsolescence, leading to its withdrawal from frontline service soon after, replaced by the Grumman TBF Avenger.
The Model
The TBD-1 Devastator model by Great Wall Hobby, released in the second decade of the 2000s, is typical of Chinese manufacturers, featuring photo-etched parts and white metal components for the wing folding mechanism—a pleasant bonus.

Building the Model
Initially, I planned a straightforward build without significant modifications. However, I ended up adding ignition wires to the engine, as the photo-etch provided looked unrealistic due to technological constraints. Additionally, I enhanced the wings and tail with navigation lights, added a landing light at the wing root, and wired the pilot's cockpit (which, unfortunately, isn't visible in the finished model). Some minor tweaks were also made.
I encountered no significant issues during the build, except with the pilot's canopy. The manufacturer offers options for both a fully closed and an open canopy; the latter posed a challenge as the parts did not fit well together, leading me to leave only the pilot's section open. The vinyl masks included for the glazing were thick and did not conform well to the curved surfaces, proving to be unsuitable.
Painting the Model
The model was primed with Mr. Surfacer 1200, not only for paint adherence but also because metallic paint, known for its finicky nature, was used to highlight imperfections, scratches, and uneven surfaces. I chose the colorful prewar scheme, starting with the lighter elements.

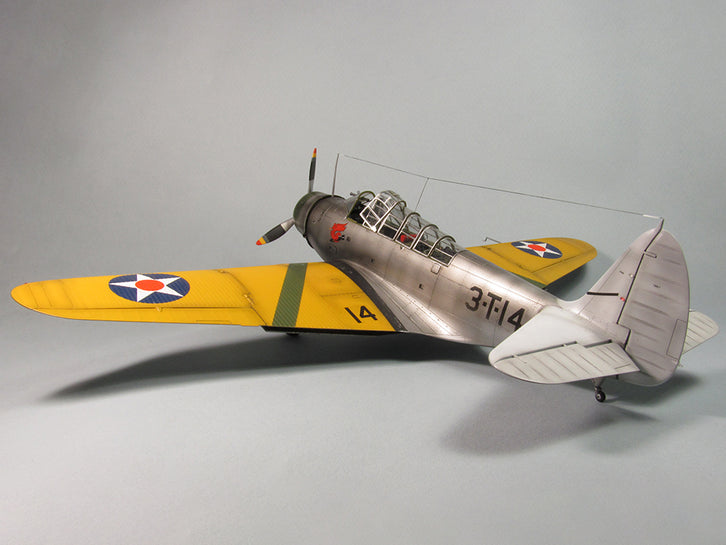
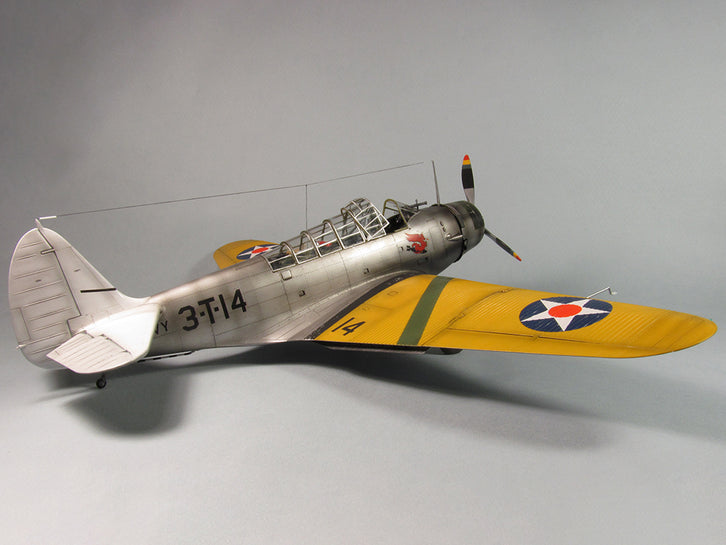
The tail and stabilizer were painted white, adhering to the 1930s US Navy aircraft markings that indicated an assignment to the USS Saratoga CV-3. The bright yellow wings, characteristic of American naval aircraft of the era, were challenging due to yellow paint's inherently poor coverage.

Lacking the original American color in the Arcus range, I opted for the British equivalent, RAF Yellow. I made a mistake in applying the yellow, as it should have extended further down the wing surfaces with a clear boundary.
This was my first experience with metallic paint. After meticulously masking the yellow wings and white tail, I applied a glossy black base to give the aluminum parts a realistic visual depth. The Arcus metallics, with their fine pigment dispersion, made the model look genuinely metallic rather than painted.


Following the initial paint layers, I proceeded with the green wing and cowling markings mean that aircraft belonged to the 5th section. Like with the yellow color, the original paint was not available at the time of building, prompting me to opt for a later color designated for cockpit painting, ANA 611 Interior Green. (Editor's note: At the time of publication, the Arcus range has introduced a color closer to the original, ANA 503 Light Green.)


Decals and Finishing Touches
After painting, decals were applied, followed by a glossy varnish. Panel lines and weathering were achieved with oil paints. Concerned that white spirit might damage the underlying paint, I applied the oil paint directly, rubbing it into panel lines.
The masks were then removed, the sliding canopy section placed, and the antenna wire strung. Overall, I'm pleased with the outcome and hope you find it equally appealing.
Thanks for reading!
Oleksandr.
(Edited and Translated by Mykhailo Orlov)


